Learn how to export your Spring Boot project from Spring Tool Suite (STS) and re-import it back into the IDE.
This is useful when you want to:
- Share your project with teammates
- Move your project to another computer
- Keep backups of your work
- Import projects downloaded from GitHub or other sources
- Upload your code as part of assignments
Try exporting and re-importing your own Task Manager project in STS to practice this workflow. Follow these steps to export your Spring Boot project and then re-import it into STS:
Step 1:
Open Spring Tool Suite (STS)
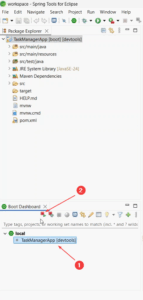
Launch your IDE and make sure the project you want to export is visible in the Project Explorer.
Select the Project.
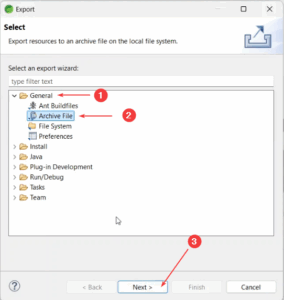
In the Project Explorer, right-click on your project folder, click on export:

In export dialogue box, Select General → Archive File
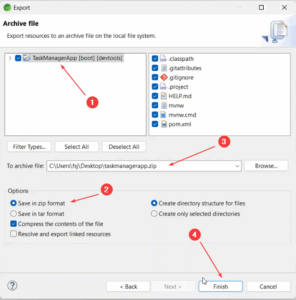
Tick your project folder, browse to choose a location (“To archive file” field), and save it as a .zip file.
Close the IDE. Exit Spring Tool Suite once the project has been exported.
Step 2:
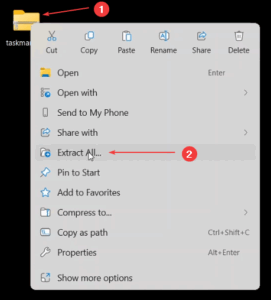
Go to the zip file location. Extract the ZIP File.
Locate the exported .zip file, right-click, and Extract All into a folder of your choice.
Step 3:
Open IDE Again. Relaunch Spring Tool Suite.
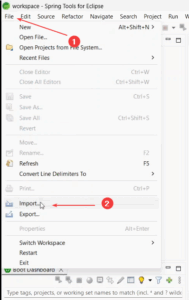
Import the Project. Go to File → Import…
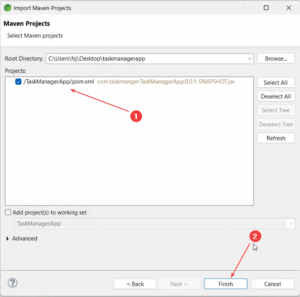
Select Maven → Existing Maven Projects.

Browse to the folder where you extracted the project.
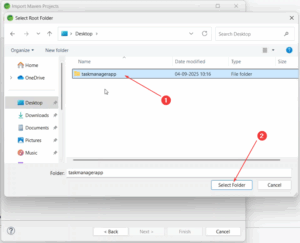
Click Finish to import.
Step 4:
Update Maven.
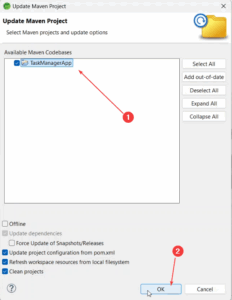
Right-click the imported project.
Select Maven → Update Project…
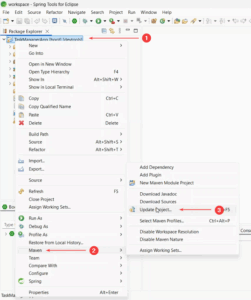
This ensures all dependencies are downloaded and the project builds correctly.
Select the project in Boot Dashboard → Run As → Spring Boot App
Verify the application runs successfully.
✅ You have successfully exported and re-imported your Spring Boot project in STS.
🎥Watch the step-by-step process in below: